
Regain Control: How to Remove MDM from Windows 10

Filed to: Quick Guides

Hi there. Today, we're going to guide you through the process of removing Mobile Device Management (MDM) from your Windows 10 system.
Step 1
Open Settings
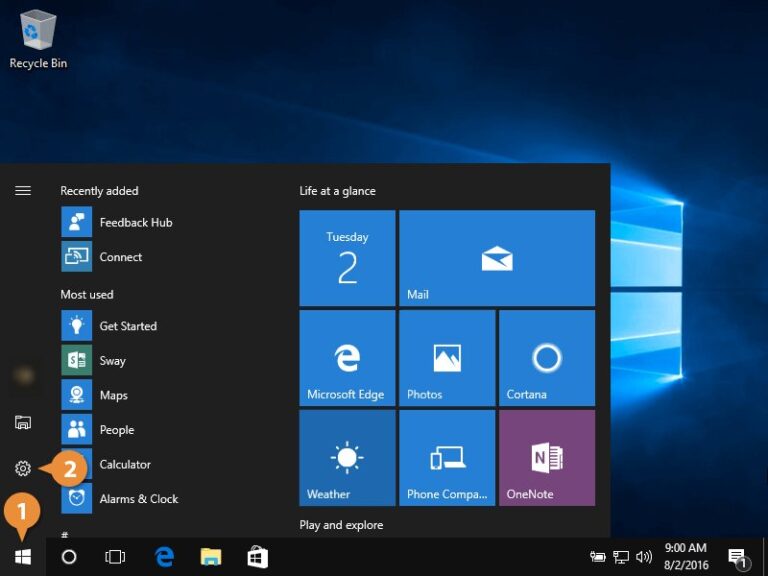
Begin by clicking on the "Start" button and selecting "Settings" from the menu.
Step 2
Access Accounts
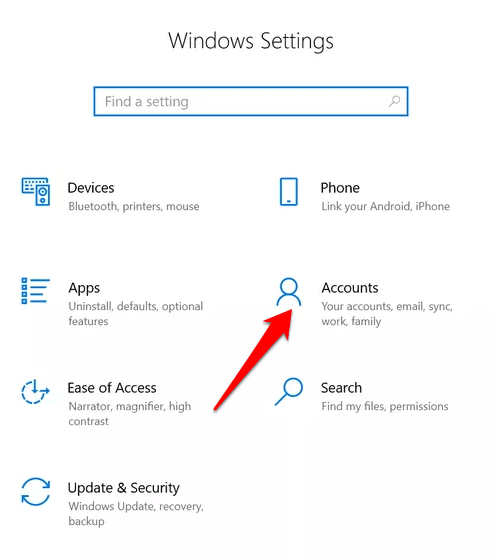
In the Settings window, click on "Accounts" to open the account settings.
Step 3
Navigate to Access Work or School
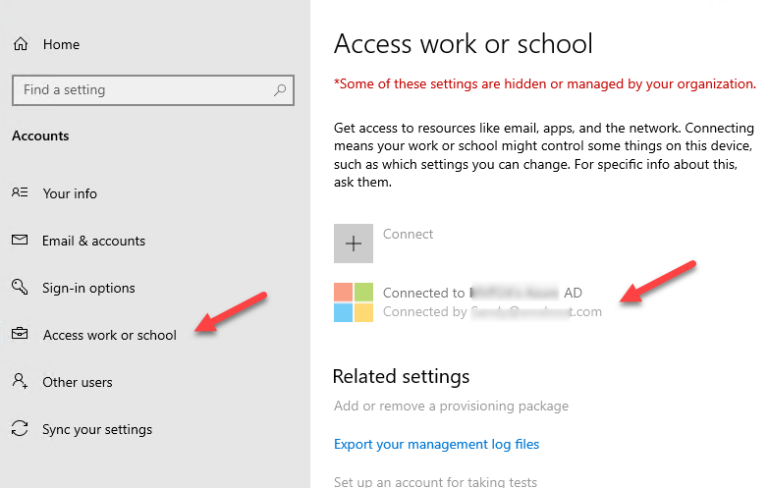
On the left-hand side of the Accounts page, click on "Access work or school"..

Step 4
Select the MDM Account
You will see a list of accounts connected to your device. Find the MDM account you want to remove and click on it..
Step 5
Click on Disconnect
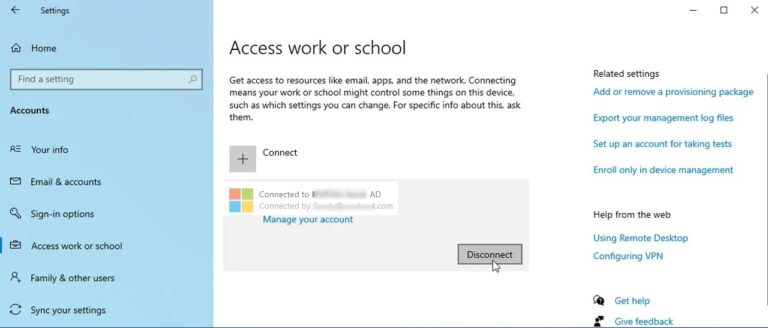
After selecting the MDM account, click the "Disconnect" button..
Step 6
Confirm Your Action
A pop-up window will appear asking you to confirm your action. Click "Yes" to proceed..
Step 7
Restart Your System
Finally, restart your system for the changes to take effect..
Free Try Mobile Device Management Solution


Leave a Reply.