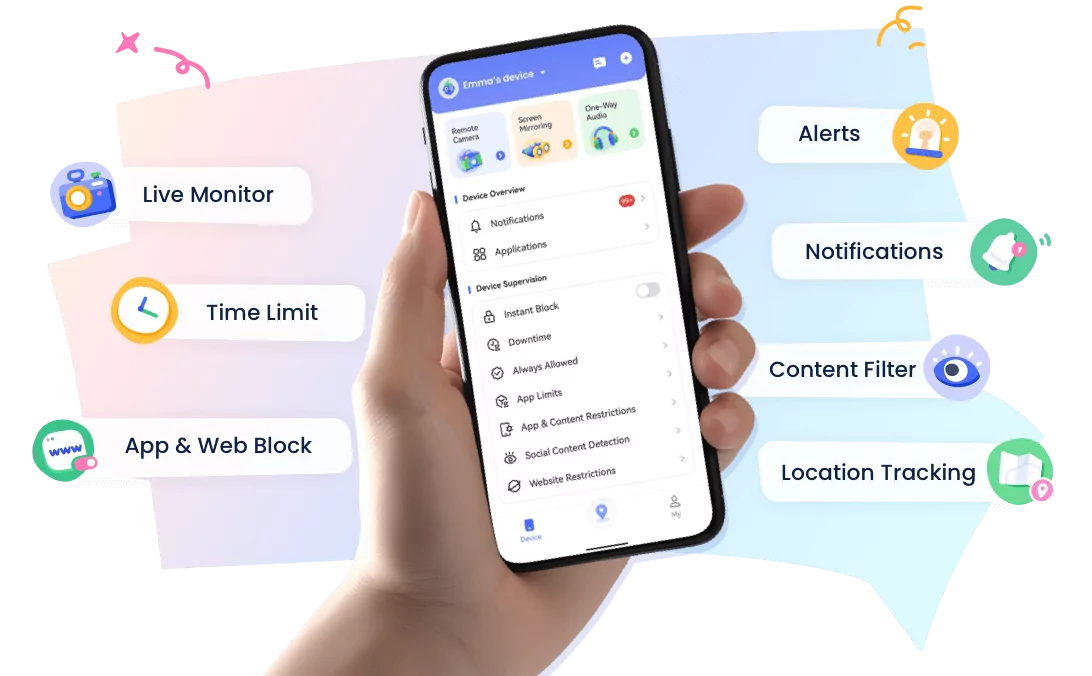
AirDroid Parental Control
24/7 Kids' Guardian via App & Web
- 👀Live surroundings and location tracking
- 🔞Content Monitoring and App/Web Blocking
- ⚠Instant alerts for online risks and geofences
- ⌛Screen time control and monitor
See What Websites Are Visited on Your Wi-Fi [Step-by-Step Guide]
Before we begin
Sometimes, browser history disappears from the device—but not from the network. Make sure you know what websites your child is visiting, even if they try to hide it.
Get AirDroid Parental Control to track browsing activity in real time and block harmful sites.

Before we begin
Sometimes, browser history disappears from the device—but not from the network. Make sure you know what websites your child is visiting, even if they try to hide it.
Get AirDroid Parental Control to track browsing activity in real time and block harmful sites.
Want to know what websites are being visited on your Wi-Fi? Whether it's to keep kids safe online or check for unwanted activity, your router can reveal the browsing history of connected devices. Here's how to do it step by step.
Can I See What Websites Have Been Visited on My Wi-Fi?
Yes, you can often see what websites have been visited on your Wi-Fi network. Routers log which devices are connected, often by IP and MAC addresses, helping identify who visited what.
Find your router's IP address and log into the router's admin panel. Then look for tabs or menus named "Logs," "System Logs," "Security Logs," "Web History," or "Activity." Then you may see a list of visited domains, IP addresses, and timestamps, depending on the router. However, many routers keep logs of domain names or IP addresses rather than full URLs with search queries.
Steps to Check Browsing History on Wi-Fi Router on Desktop
As mentioned above, many routers do not provide detailed browsing history, only IP address logs.
To show you how to check these detailed histories on a computer using a router, we'll take the ASUS router, which provides this feature, as an example.
Step 1. Find your IP address.
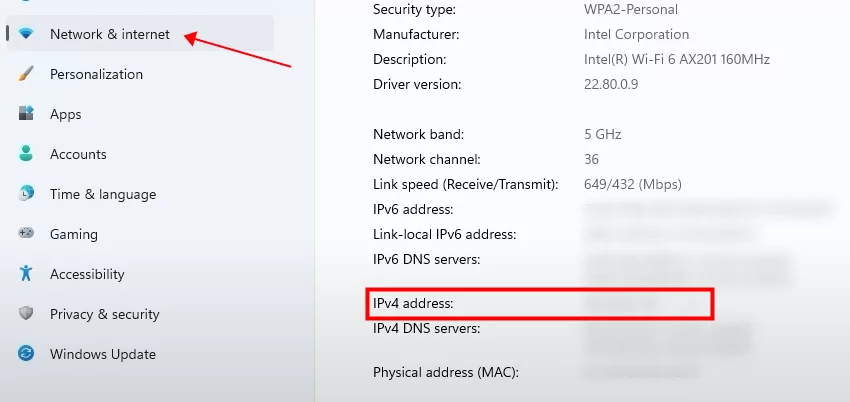
• For Windows users, go to Windows Start > Settings > Network and Internet > Wi-Fi > Properties. Then scroll down and find your IP address listed next to 'IPv4 address.'
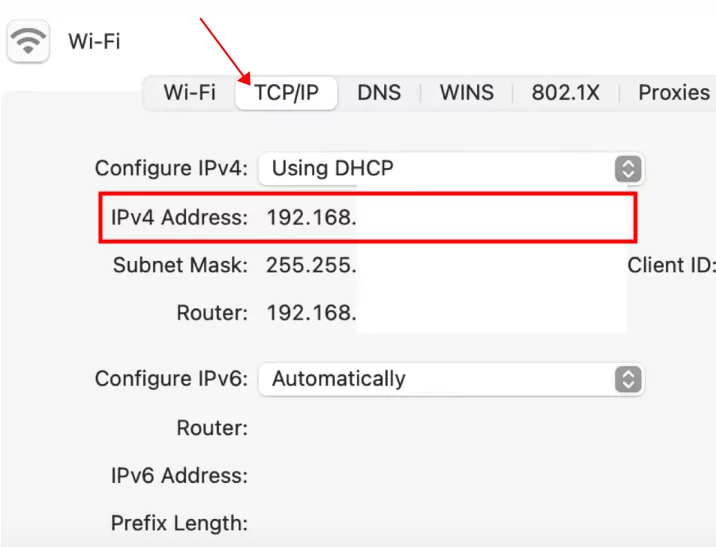
• For Mac users, go to Apple menu > System Preferences > Network > Wi-Fi > Advanced > TCP/IP. Here you can see your IP address in 'IPv4 address.'
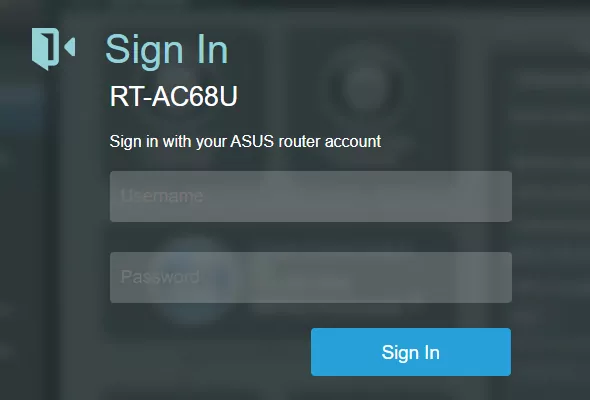
Step 2: Type your IP address into a web browser's search bar. If you're a ASUS router user, you can just access https://www.asusrouter.com
Step 3. On the login page, enter your username and password.
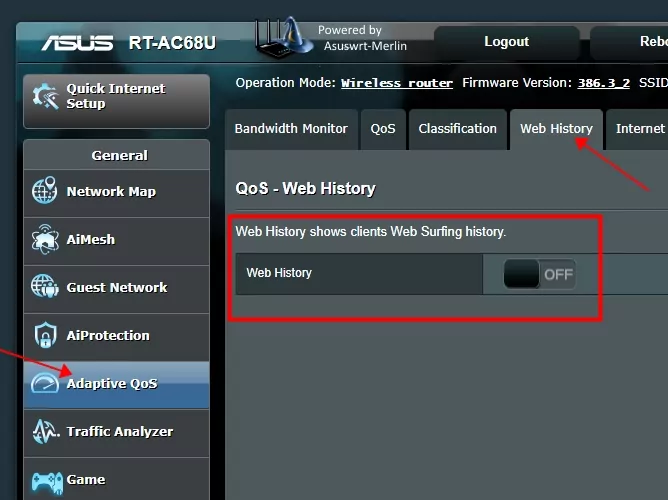
Step 4. Choose 'Adaptive Qos' from the left menu, then select the 'Web History' tab. The Web History is disabled by default. Simple toggle on the button.
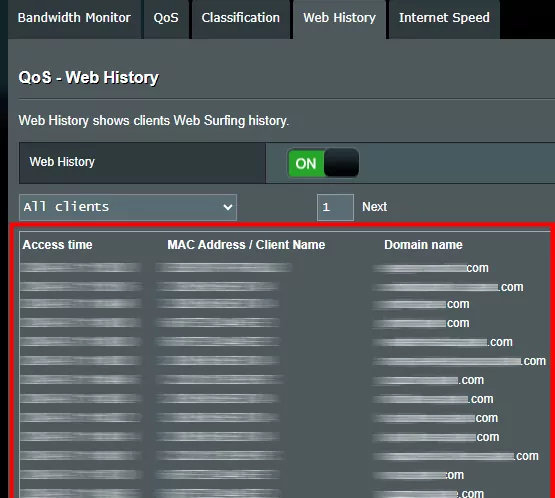
Step 5. After a few seconds, you'll see the browsing history under 'Domain name.'
How to Check Wi-Fi Router History on Phone
Now let's see how you can check router history on your phone, whether you're using an iPhone or an Android phone.
On iPhone
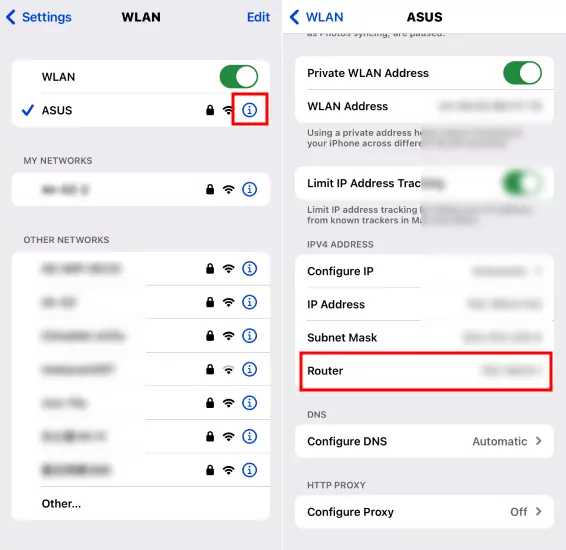
Step 1. Open Settings and tap 'WLAN.'
Step 2. Tap the "i" icon.
Step 3. Scroll down to IPV4 ADDRESS and you'll see your router IP address in 'Router.'
Step 4. Long-press and copy it. Then paste it into the search bar of a browser, such as Safari.
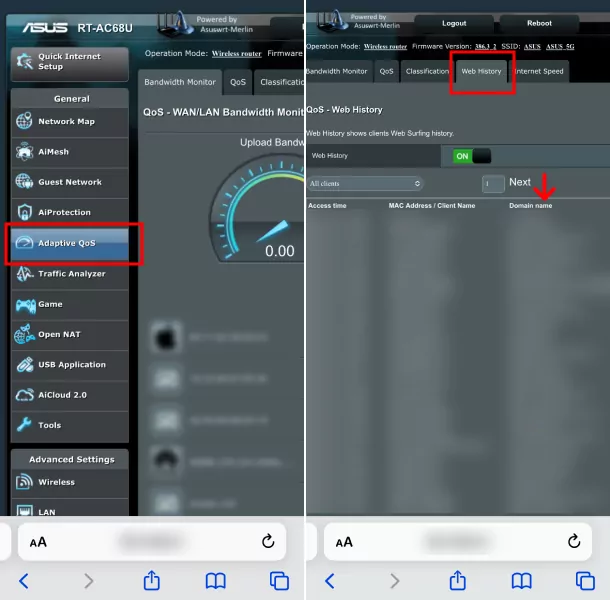
Step 5. You'll see the same page like you open on your computer. Then tap Adaptive Qos > Web History to see the browsing history.
On Android
Step 1. Open Settings and go to Internet.
Step 2. Tap the gear icon.
Step 3. Scroll down to 'Gateway' to see the router's IP address.
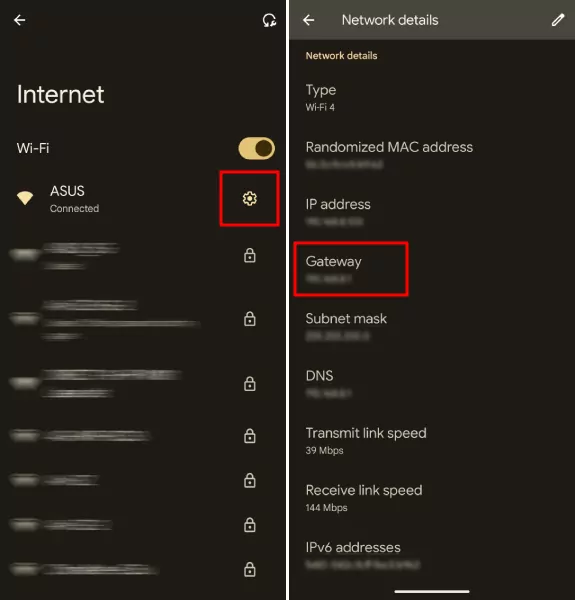
Step 4. Next, open a browser on your phone and follow steps 4 to 5 outlined in the iPhone section to view your router's browsing history.
Bonus: Check What Websites Your Kid Visited
Routers can show logs, but they're limited (often only IP addresses, not full URLs).
If you want real browsing details + website blocking, tools like AirDroid Parental Control give you clearer reports and allow parents to set restrictions directly. It works with most popular broswers, such as Safari, Chrome, etc. With it, parents can:
- Set up a URL blacklist and whitelist for kids.
- Get alerts when a child tries to open a blocked site.
- Review child's browsing history.
- Block websites by categories.

Quick Summary
- Most routers only log domains or IPs, not full URLs.
- On desktop and mobile, you can access router logs via the admin panel.
- ASUS and some brands provide a clear “Web History” feature.
- For parents, router logs may not be enough. Tools like AirDroid Parental Control give real-time browsing reports, alerts, and website blocking.


Leave a Reply.