

How to Use Content Management Service (CMS) in AirDroid Business
AirDroid Business introduces a robust Content Management Service (CMS) to enhance the management and distribution of media files across Android devices. This guide will walk you through the features and functionalities of CMS, helping you leverage its capabilities for efficient corporate file management.
1Media Library - Secure and Convenient File Management
1Upload Files
There are 2 methods to upload files.

Method 1: Local Upload
- Step 1: Click the [Upload Files] button or the [triangle icon] next to it and select "Upload from Computer."
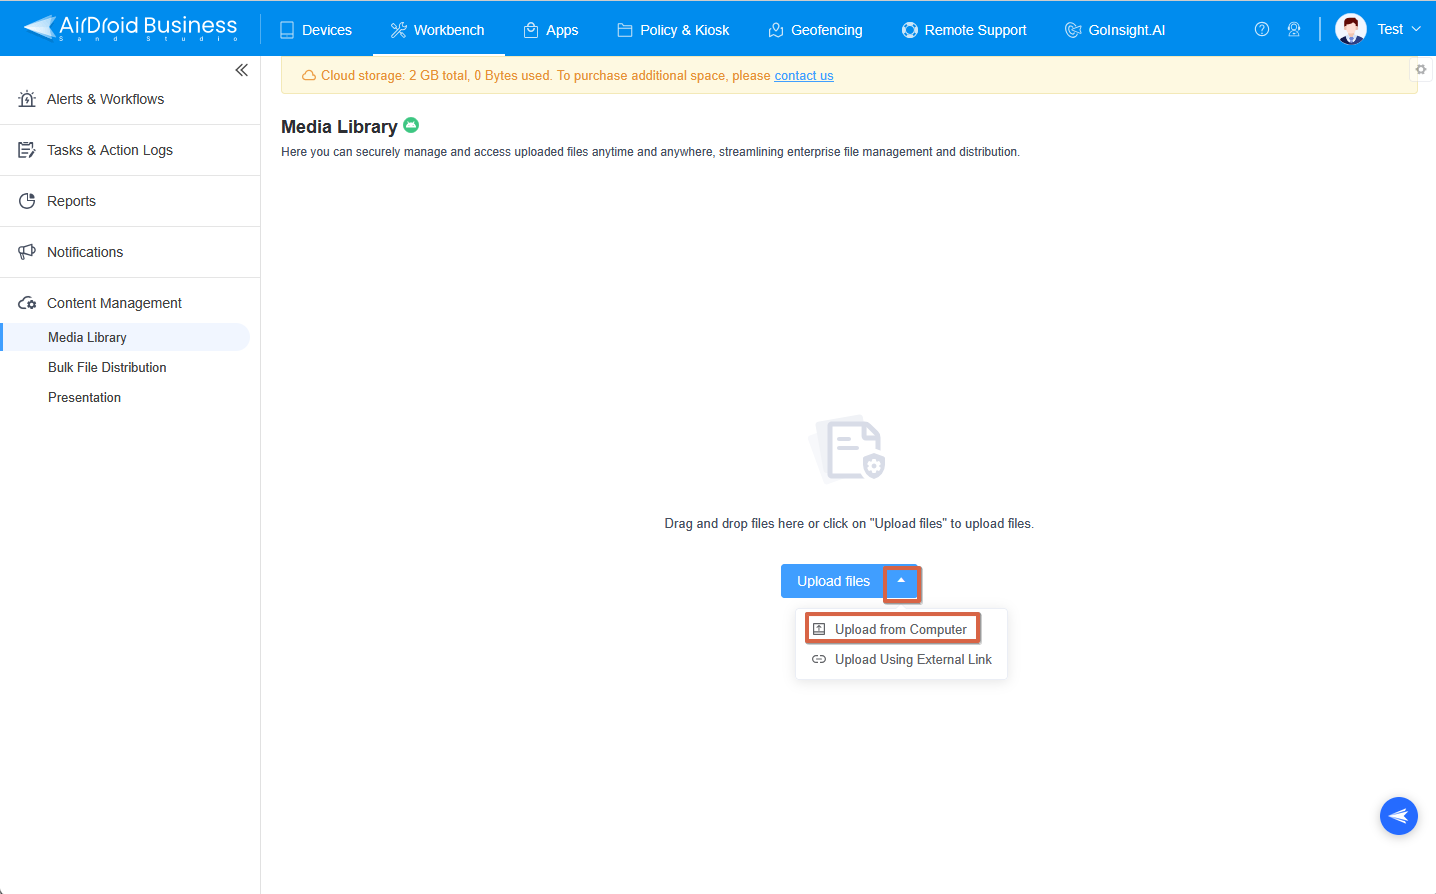

- Step 2: Select the file you wish to showcase from your computer and upload it.
- You can also drag and drop files or folders directly into the list area.
1. Uploading files locally will consume cloud storage space, which is limited to 2GB.
2. Additional cloud storage can be purchased if needed.
3. The size of a single file cannot exceed 1GB. If any selected file is larger than 1GB, none of the files will be uploaded.
Method 2: External Links
- Step 1: Click the [triangle icon] next to the button and choose "Upload Using External Link."

- Step 2: Paste a Google Drive file URL that has public access and press “Save” to confirm.
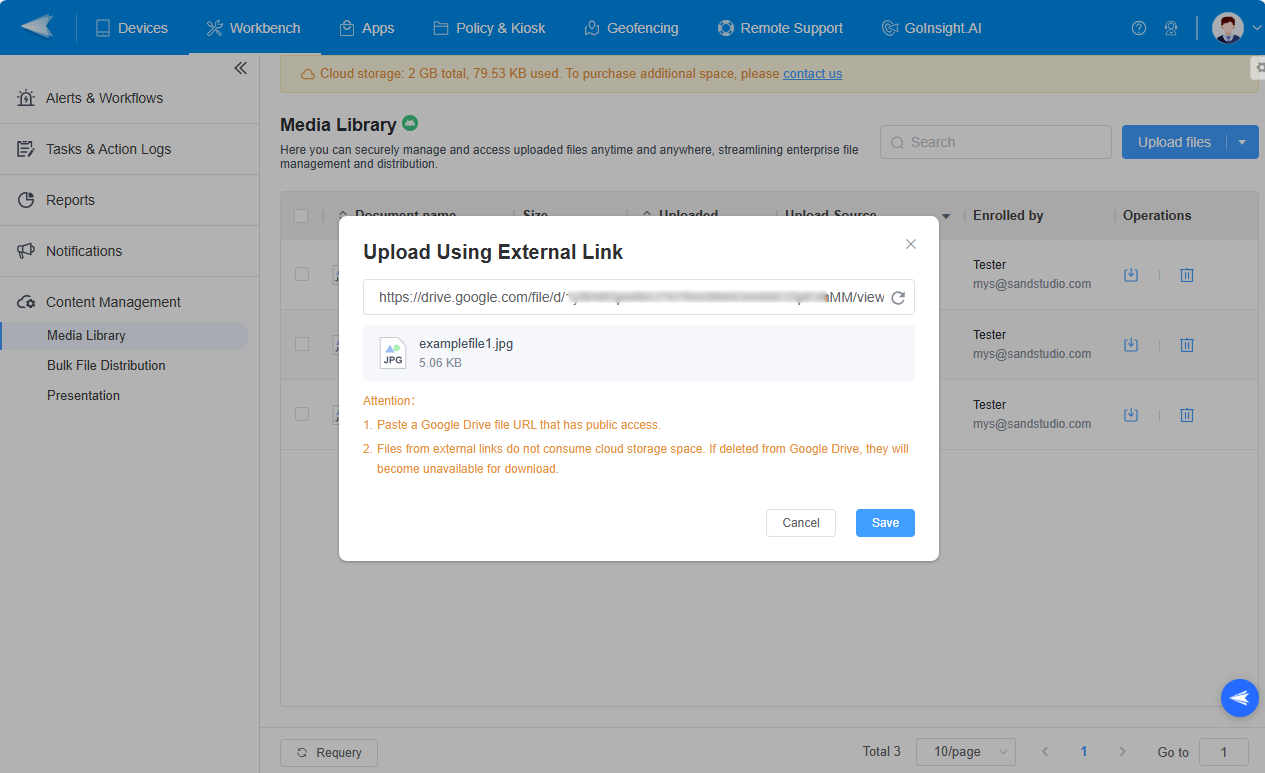

1. Ensure the Google Drive file URL has public access.
2. Files from external links do not consume cloud storage space. If deleted from Google Drive, they will become unavailable for download.
3. Uploading folders via external links is not supported.
2Manage the Media Files
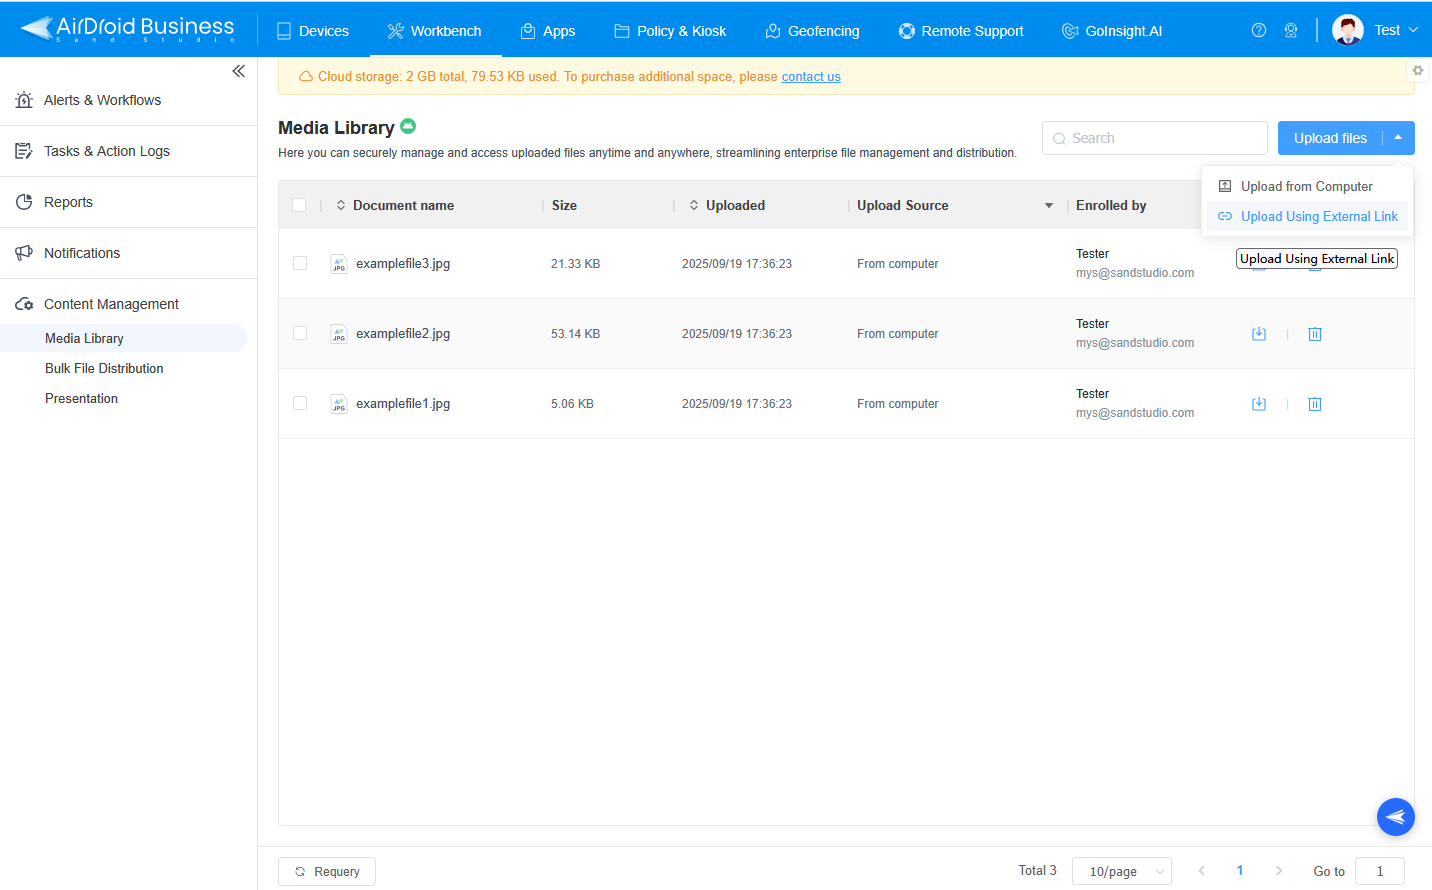
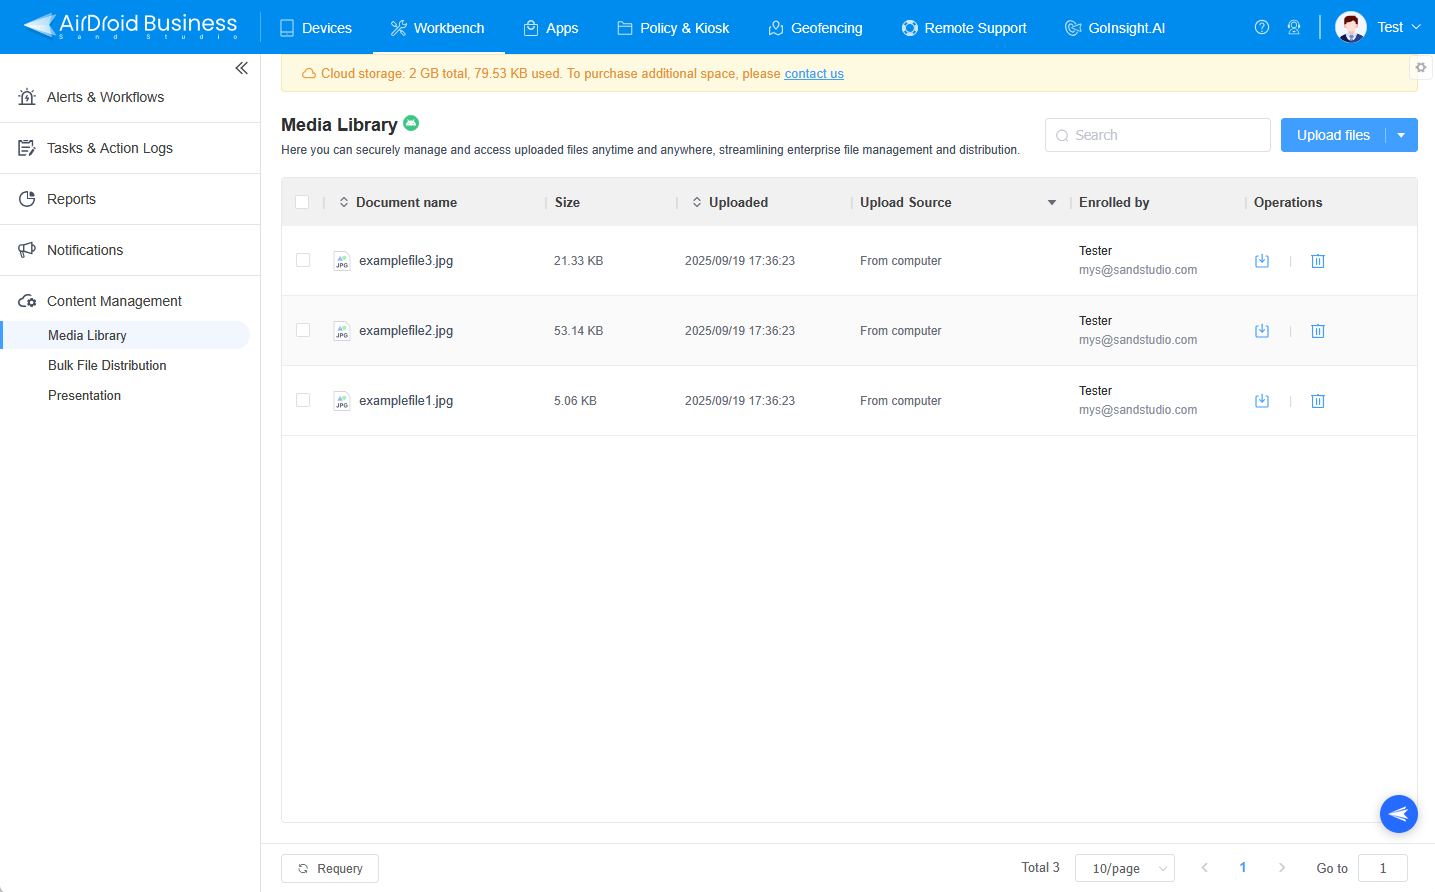
Once uploaded, you can manage your media files through the file list area. You can view details such as document name, size, upload time, upload source, and the member who enrolled the file. Additionally, you have options to download or delete files as needed.
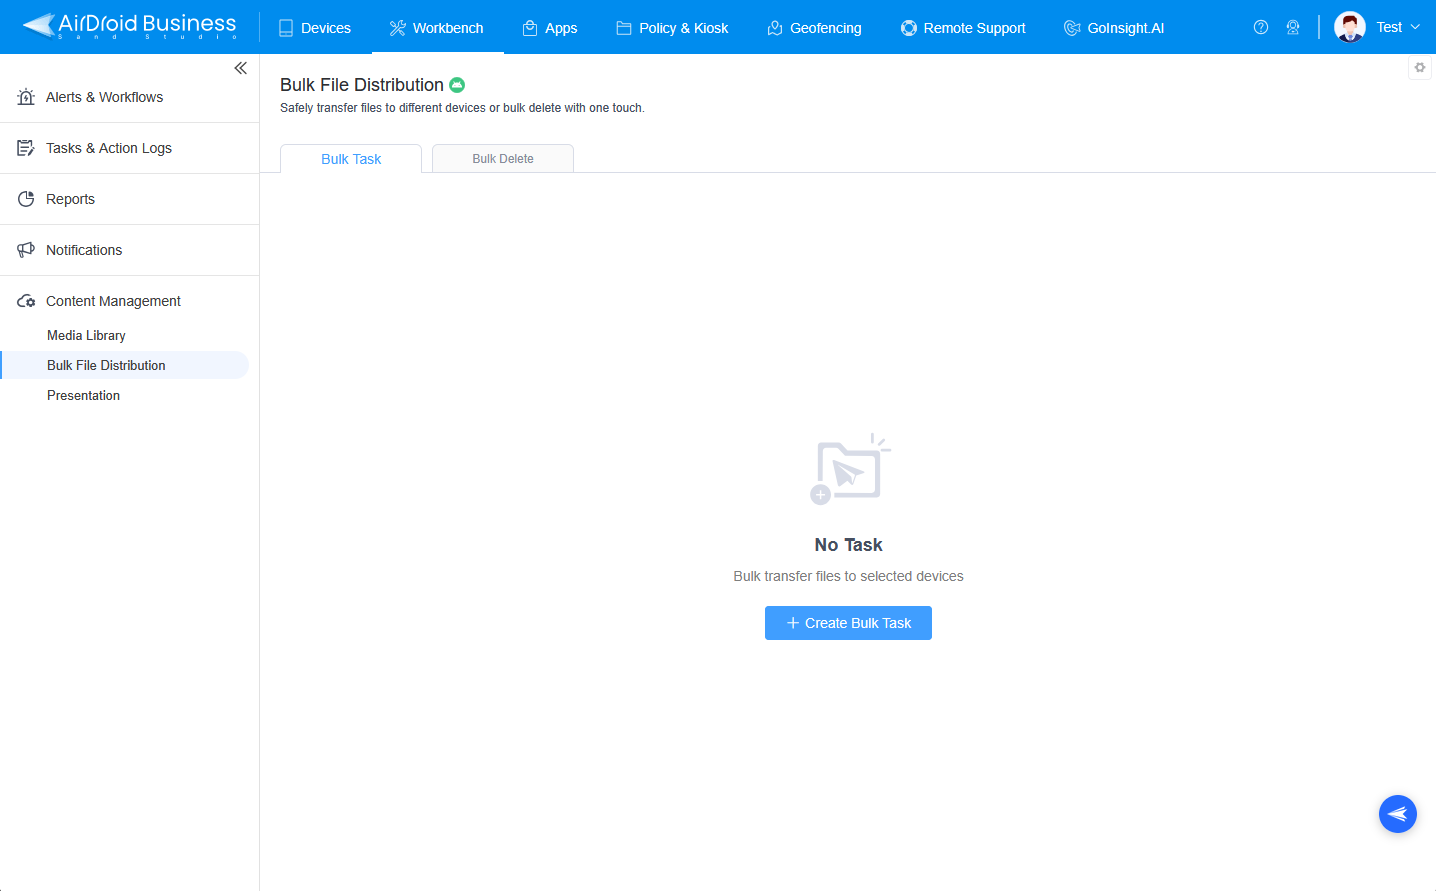
2Bulk File Distribution - Enhanced File Distribution
The Bulk File Distribution feature efficiently manages file transfers and deletions across multiple devices with ease. Now it supports direct importation from the Media Library, enabling seamless and streamlined file distribution.
1Bulk Task -Bulk Transfer Files to Selected Devices
- Step 1Create a Bulk Task
- Click the [+Create Bulk Task] button to begin.

- Step 2Add Files
- There are also two ways to add files.
- Option 1: Upload from computer
- Click the [Upload Files] button to add files, or simply drag and drop them into the designated area.
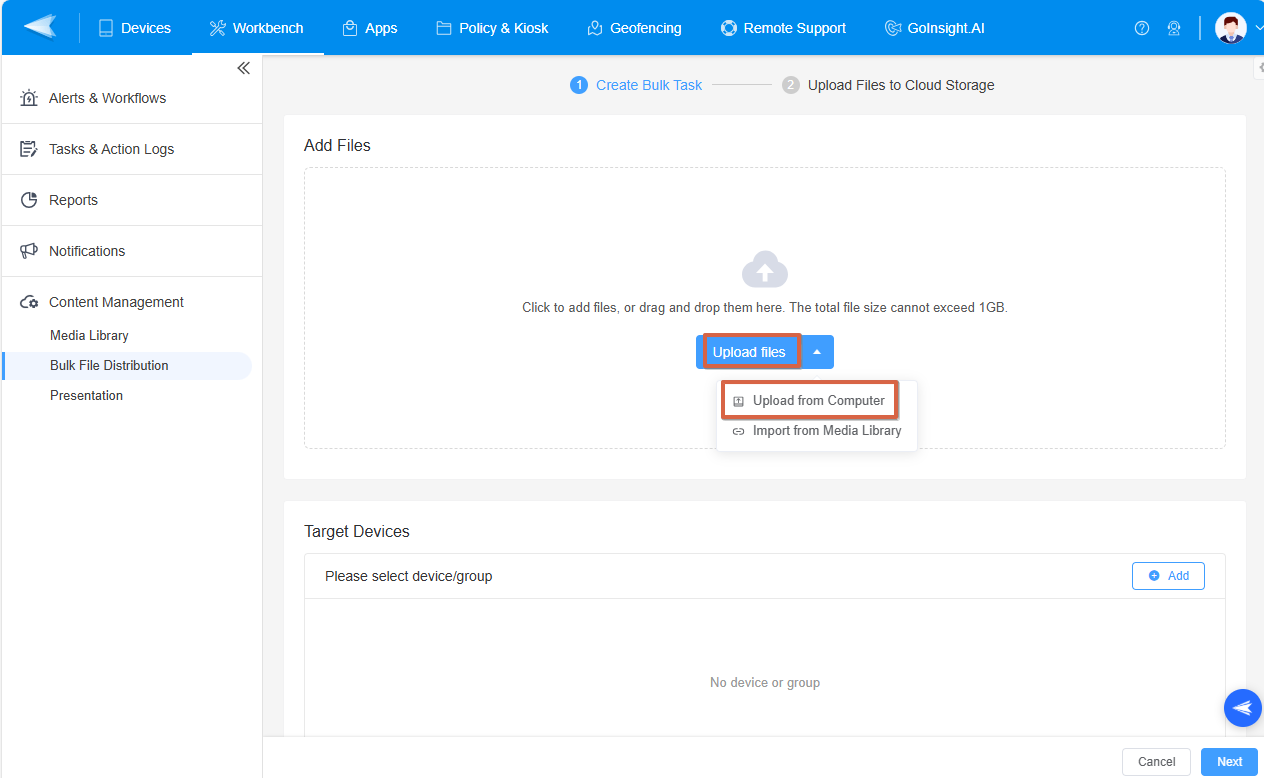

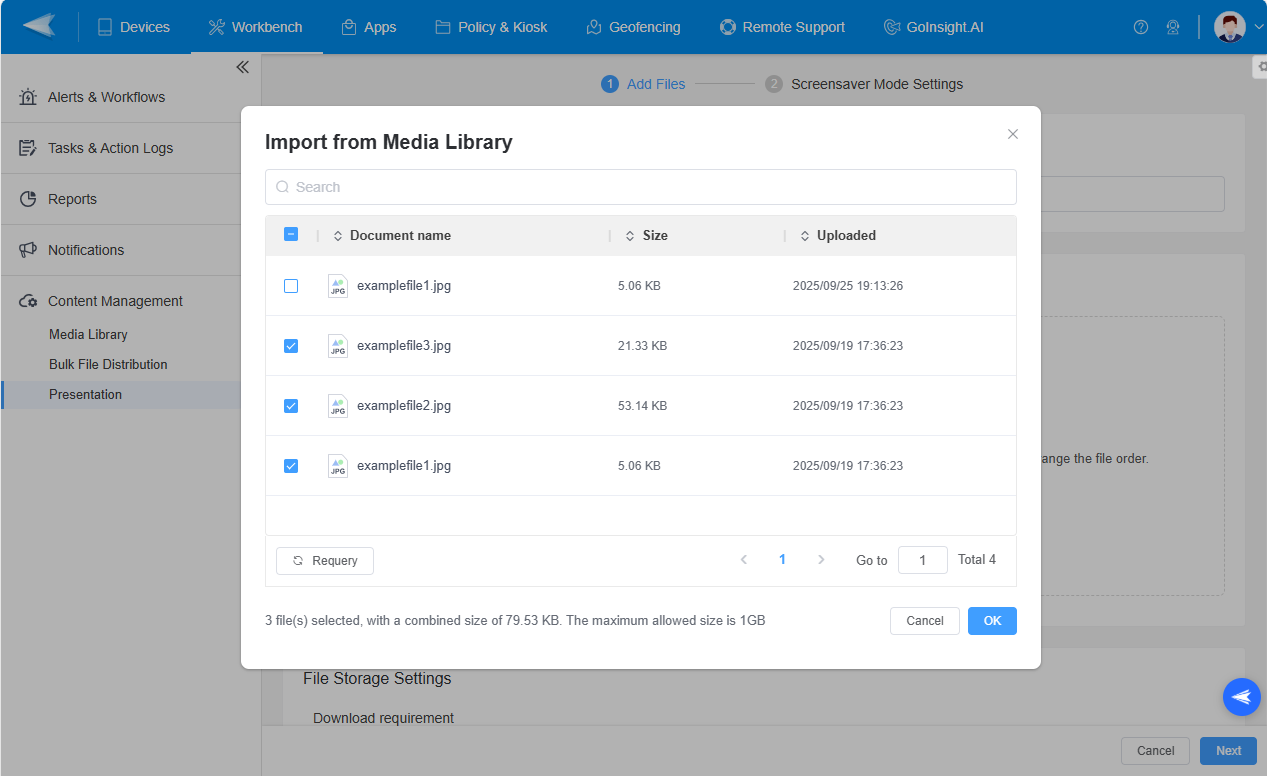
- Option 2: Import from Media Library
Click the [triangle icon] next to the button and select "Import from Media Library." 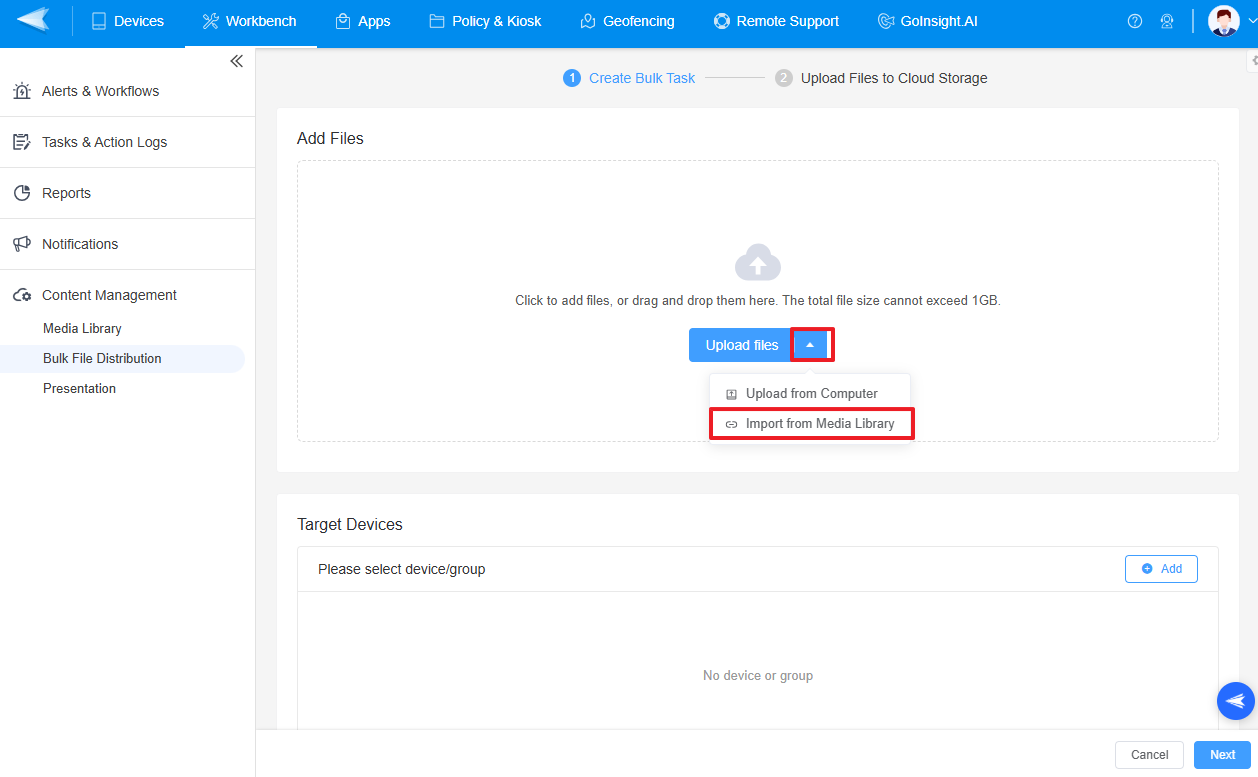

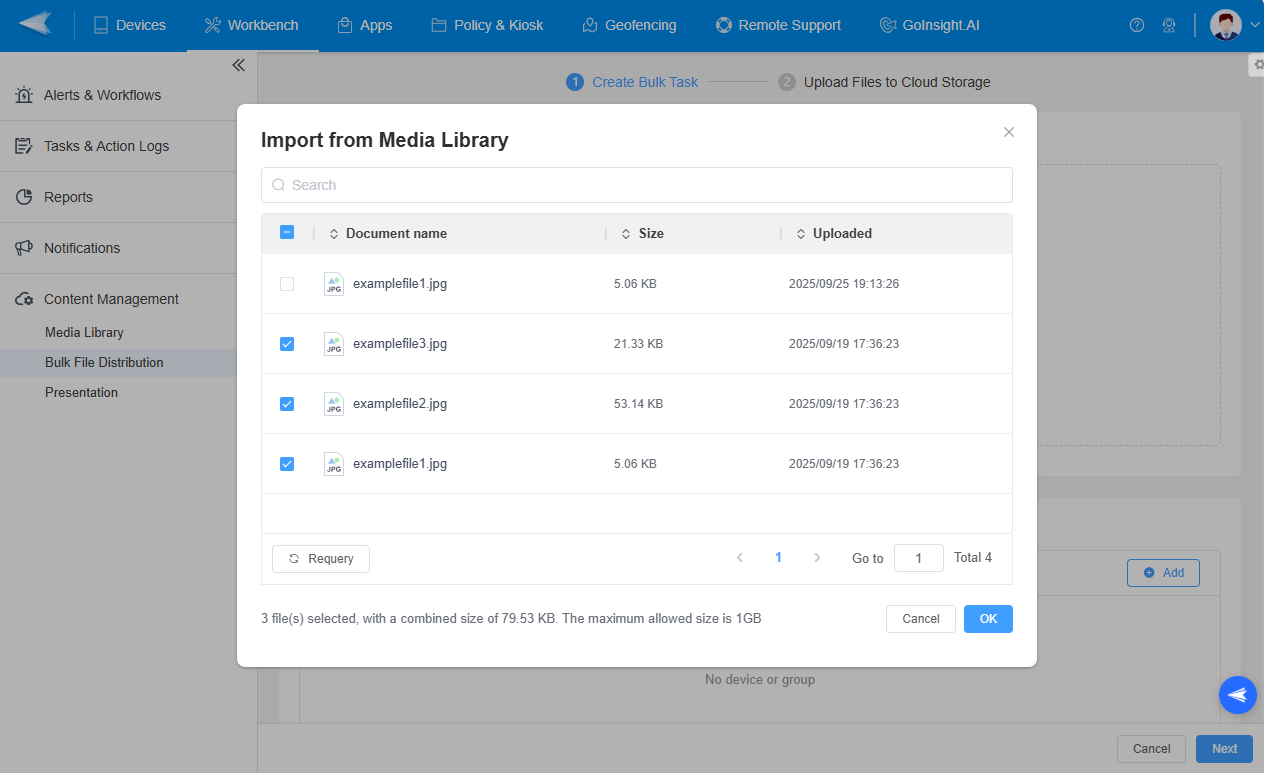
- Choose the files you wish to distribute and click "OK" to confirm.

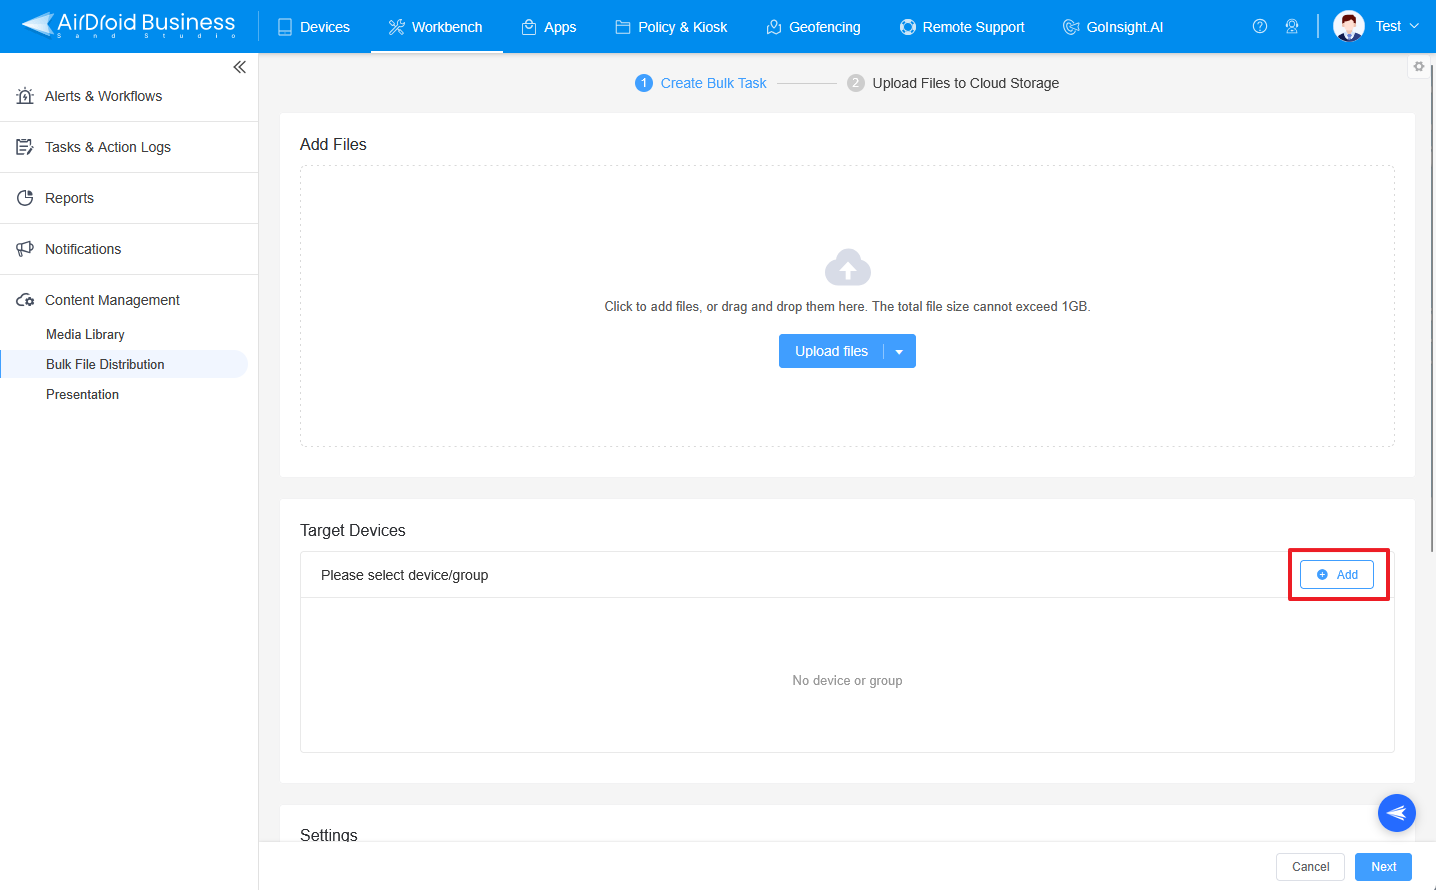
- Step 3Select Target Devices
- Click the [+Add] button to choose the device or group of devices for file distribution.

- Step 4Configure Settings
- Download Requirements:
Choose to use any network or restrict to Wi-Fi for downloading. - File Save Paths:
Default save path is /storage/emulated/0/AirDroidBiz/upload. -
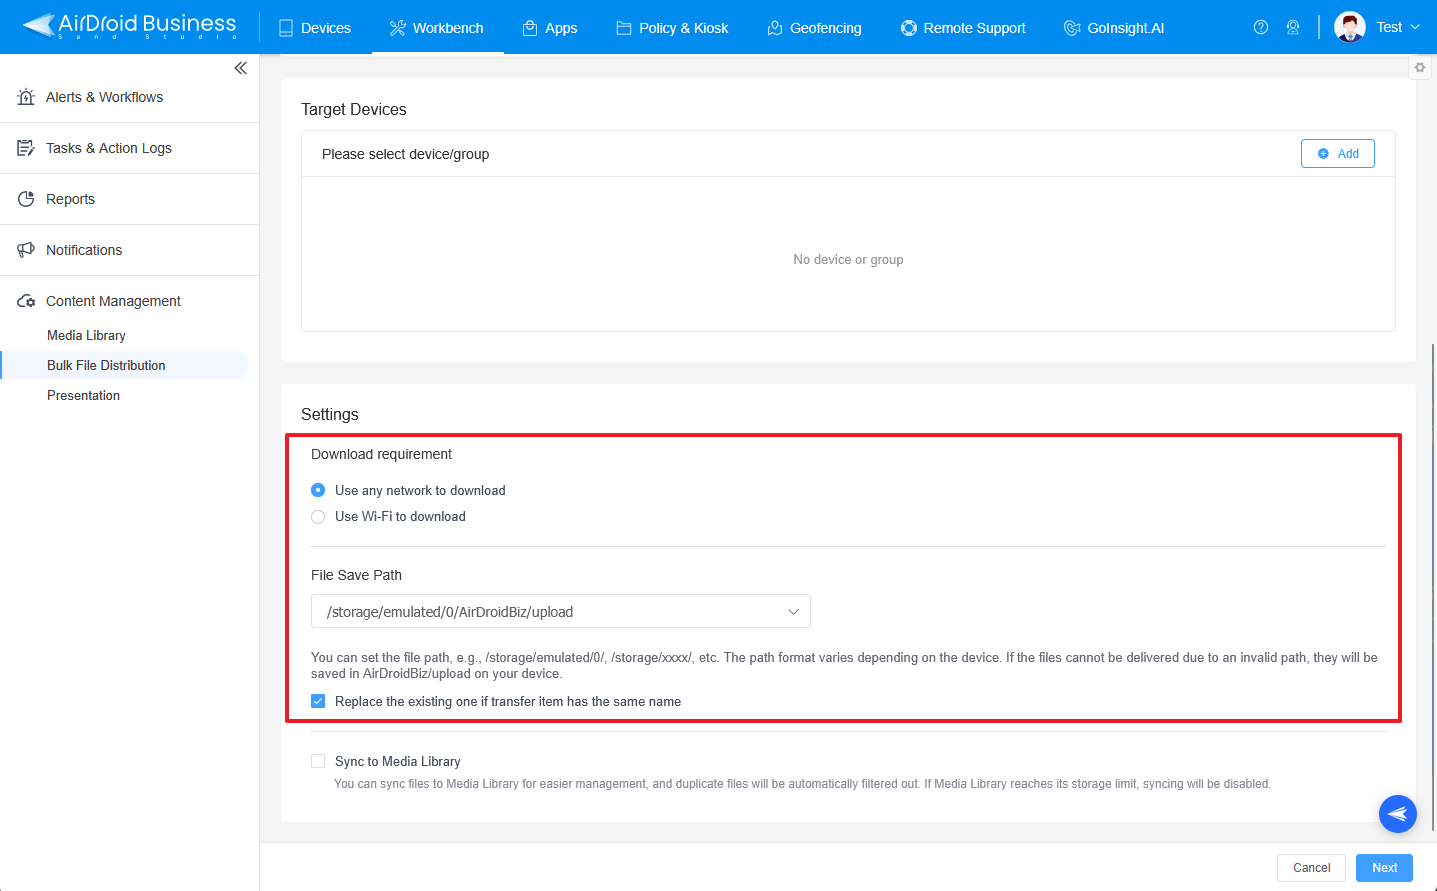

- Download Requirements:
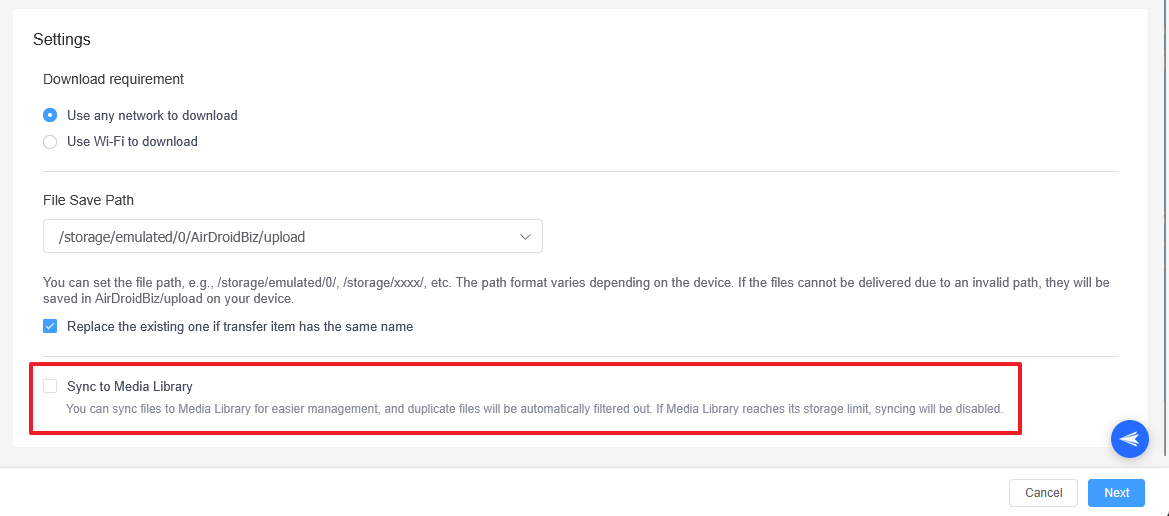
- Step 5Sync to Media Library
- Option to sync locally added files to the Media Library for easier management.

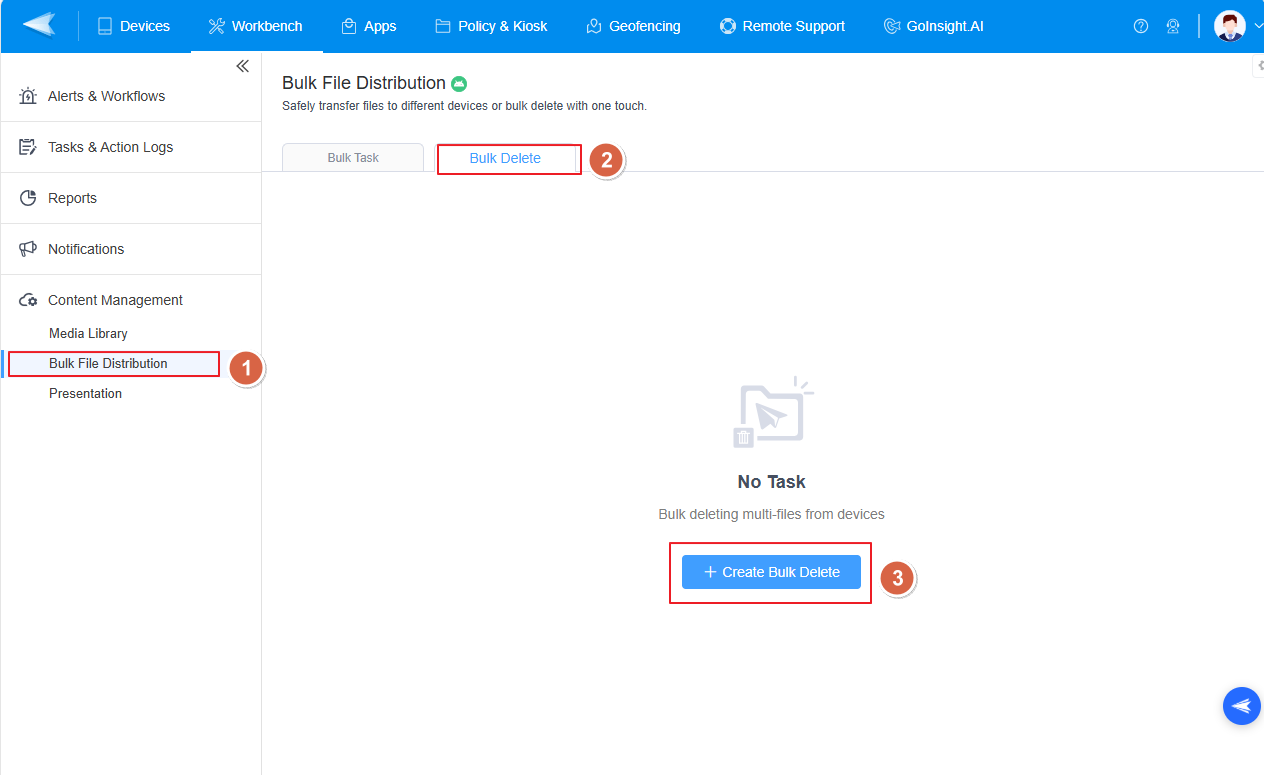
2Bulk Delete - Bulk Deleting Multi-files from Devices
- Step 1Create Bulk Delete
- Click "Add" to choose the files you want to delete.

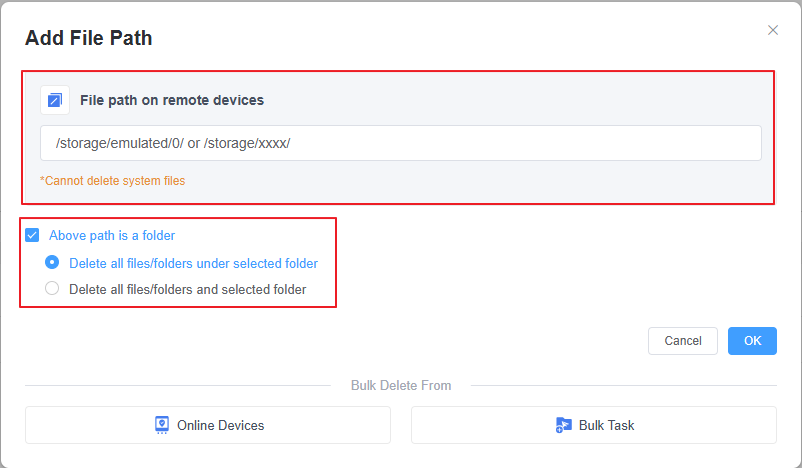
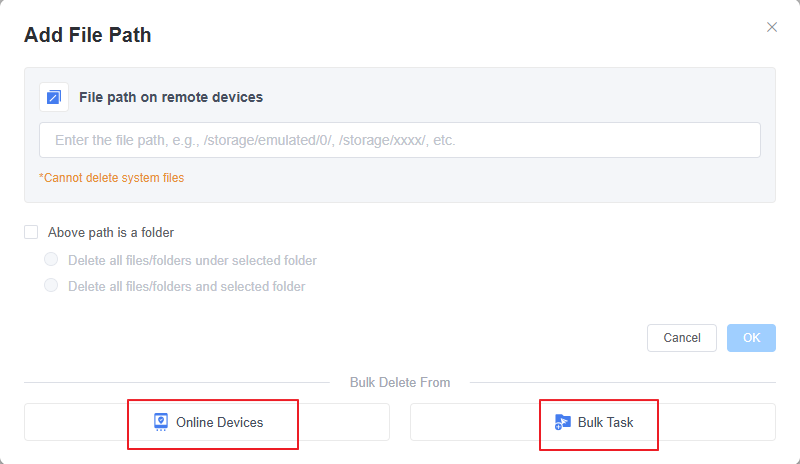
- Step 2Add File Path
- Enter the file path on remote devices where the files are located. Example paths include /storage/emulated/0/ or /storage/xxxx/.Note: System files cannot be deleted.
- Step 3Choose Deletion Options
- Above Path is a Folder: Confirm if the path entered is a folder.
- Delete Options:
- 1. Select "Delete all files/folders under selected folder" to remove contents within the folder.
- Choosing this option will remove all contents within the folder but retain the folder itself. This is useful if you want to clear the folder while preserving its structure.
- 2. Choose "Delete all files/folders and selected folder" to remove the folder and its contents.
- Choosing this option will remove the folder and all its contents. This is suitable if you want to completely remove the folder and everything inside it.
- Step 4Confirm selections
- Click "OK" to confirm your selections.

- Step 5Choose Execution Method
- Choose whether to execute the bulk delete from "Online Devices" or as a "Bulk Task."
- Online Devices:
- Selecting this option will immediately execute the deletion on currently online devices.
- Bulk Task:
- Selecting this option will create a bulk task that can be executed on a specified group of devices. This is suitable for tasks that need to be performed simultaneously on multiple devices.

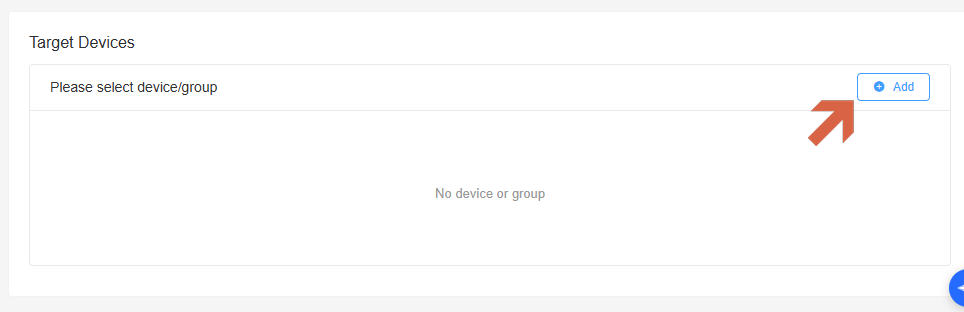
- Step 6Add Target Devices
- Select the device or group of devices from which you want to delete the files.

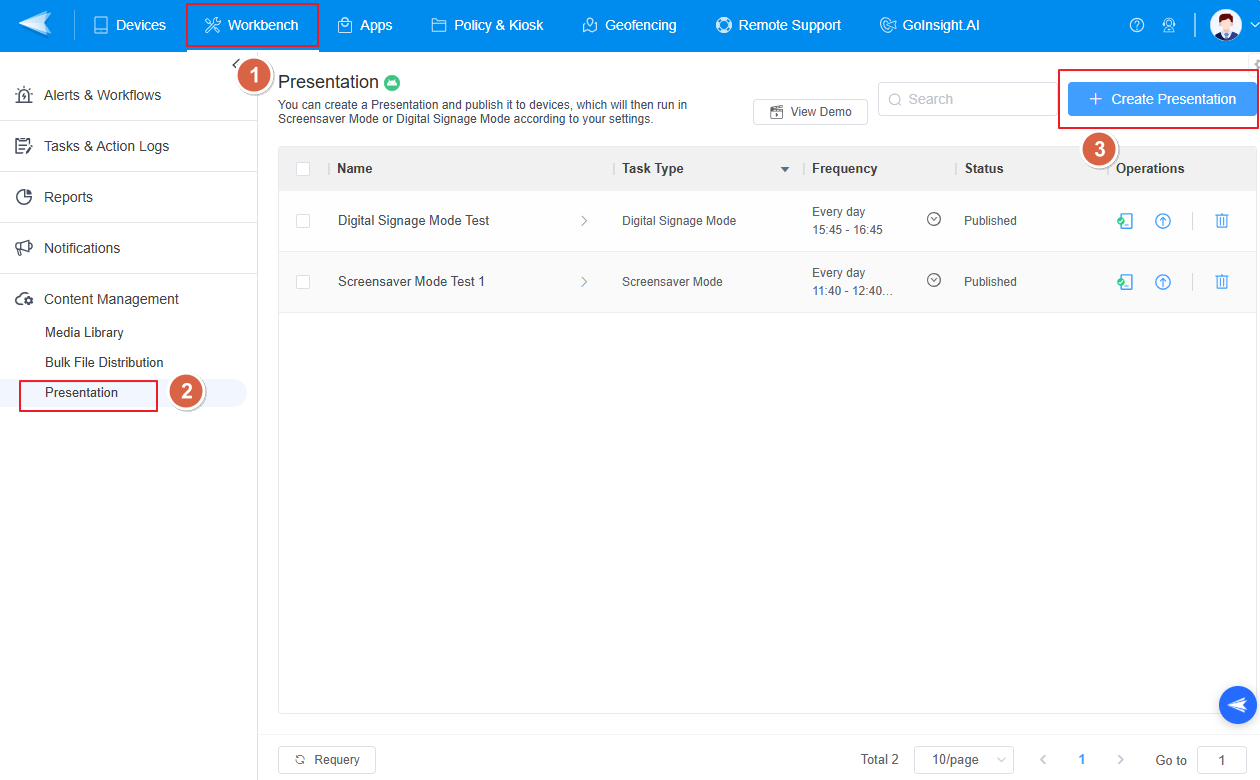
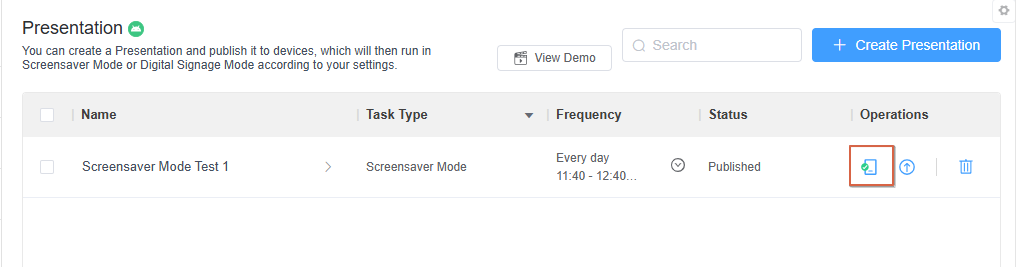
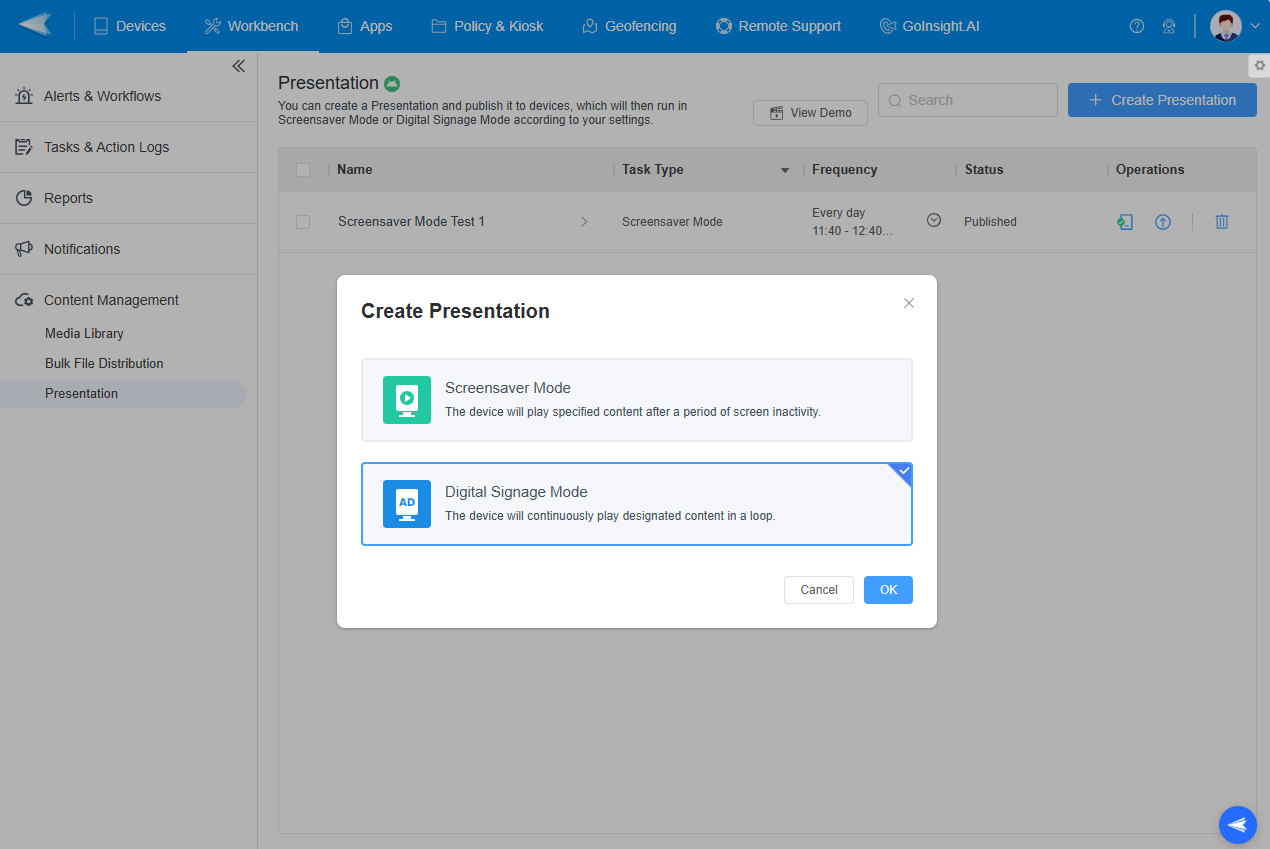
3 Presentation
You can create a Presentation and publish it to devices, which will then run in Screensaver Mode or Digital Signage Mode according to your settings.
1 Screensaver Mode
Devices automatically play specified content after being idle, ideal for retail environments to attract customers. (e.g. ordering kiosks playing ads when idle to attract customers and boost sales).
Setup Requirements:
- Step 1Install the Showcase app on devices.
- Step 2Grant necessary file permissions for operation.
Steps for Screensaver Mode:
- Step 1Click the [+Create Presentation] Button.
-

- Step 2Enter a task name.
-
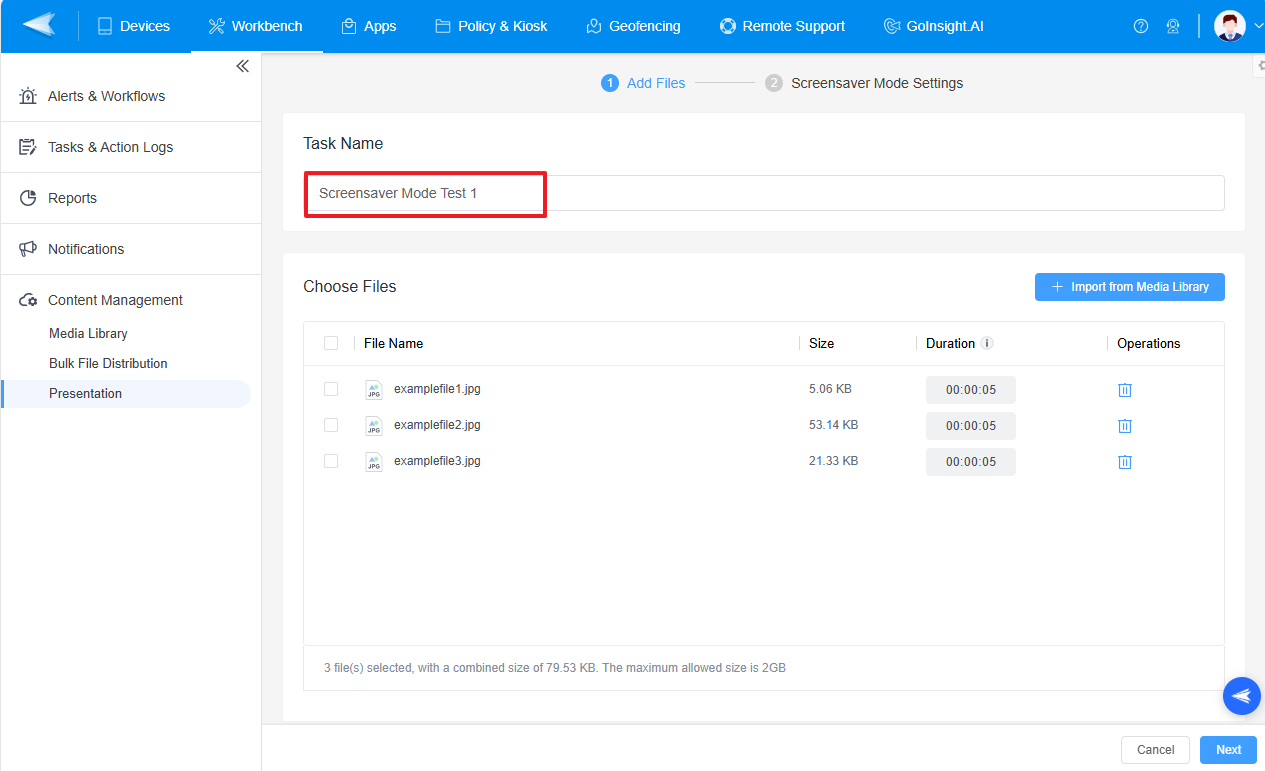

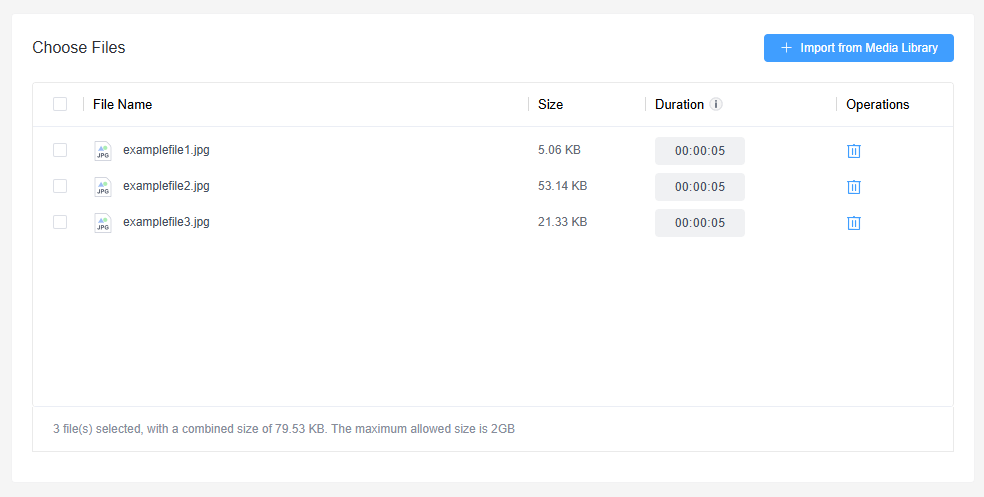
- Step 3Choose Files.
-
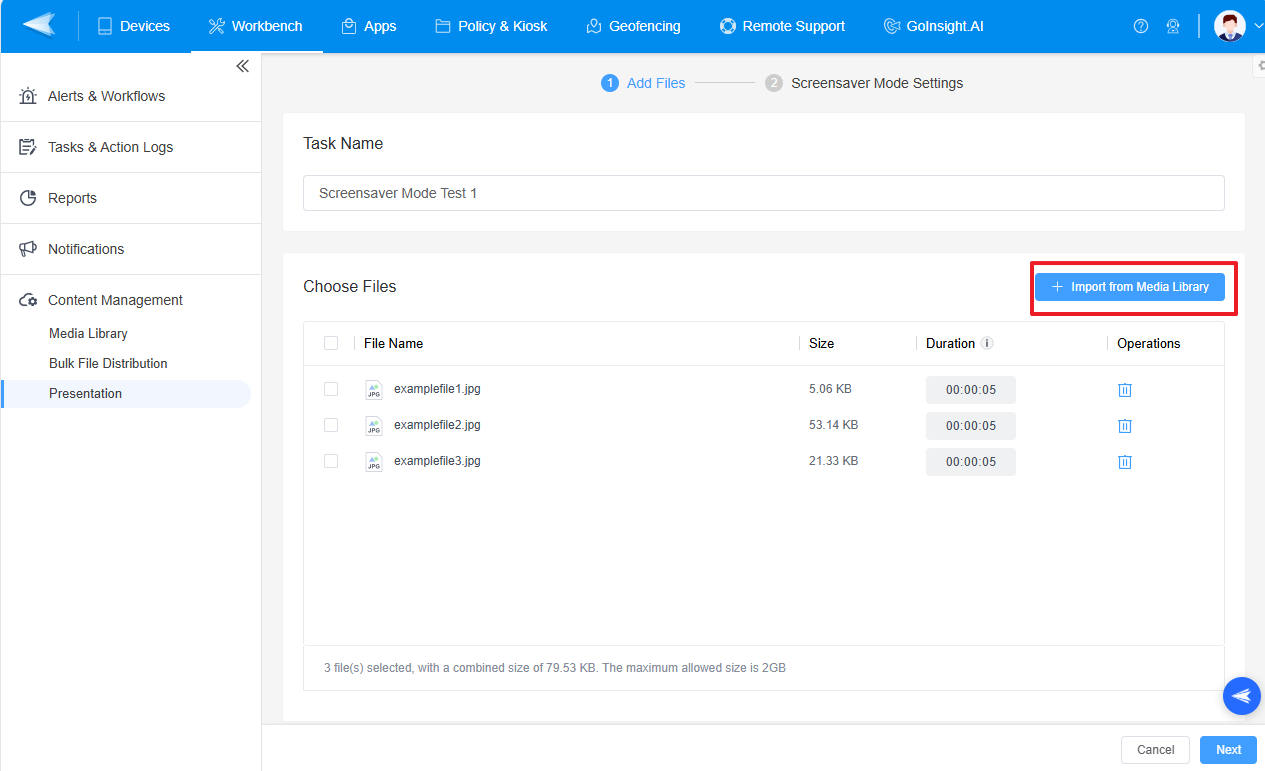
-

- Supports png, jpeg, jpg, gif, mp4, and mkv files.
- The device will loop through the files in order.
- You can drag to rearrange the file order.
- The maximum allowed size is 2GB.
- You can set the playback duration for each file, but video format settings are not supported.
- Step 4File Storage Settings
- Configure download requirements: Use any network or Wi-Fi.
- Configure file save paths. Default save path is /storage/emulated/0/AirDroidBiz/upload.


- Step 5Click [Next].
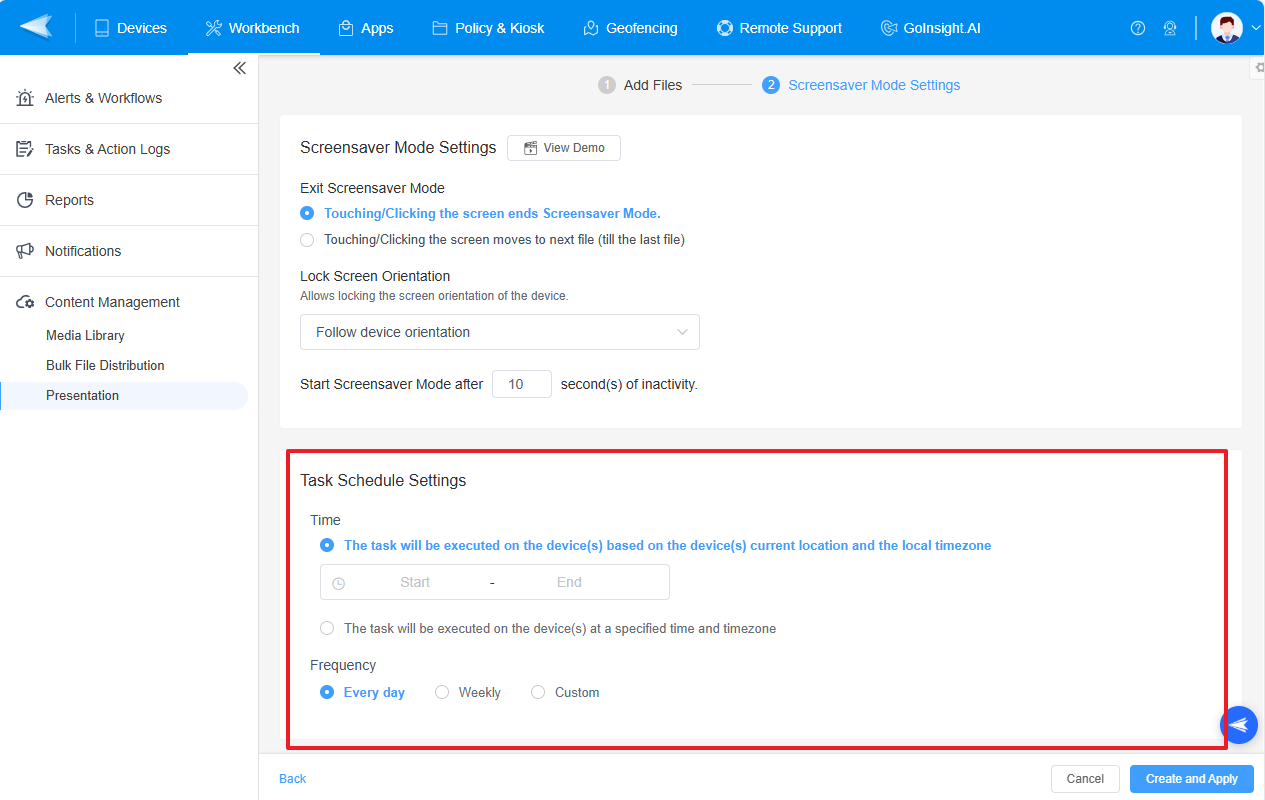
- Step 6Screensaver Mode Settings
-


- Touching/Clicking the screen ends Screensaver Mode.
- Touching/Clicking the screen moves to next file (till the last file).
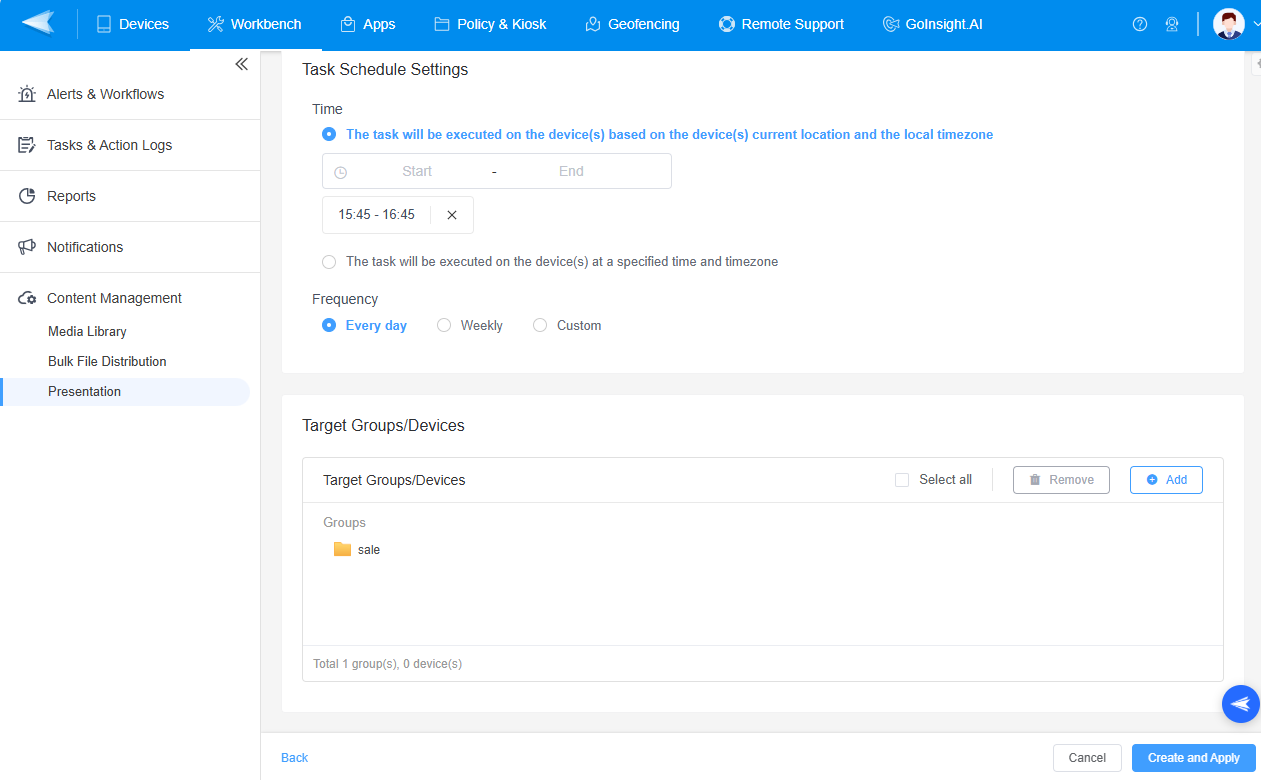
- Step 7Task Schedule Settings
Exit Screen Mode: Choose how to exit (touch to end or move to next file).
Lock Screen Orientation: Choose orientation ("Follow device orientation", "Landscape Mode" and "Portrait Mode").
The screen saver mode will be started automatically after the device has not been operated for many seconds. The default value is 10s, and you can enter a value in the range of 1-999s.
You can Set the run time and frequency for the screensaver task.
- Option 1: Execute the task based on the device's current location and local timezone. You can choose multiple time slots for execution.
- Option 2: Execute the task at a specified time and timezone. You will need to set the time zone, start time, and end time for each slot.
Select multiple time slots and determine the frequency as daily, weekly, or custom dates. The task will run during these specified periods and remain inactive during non-operational hours.
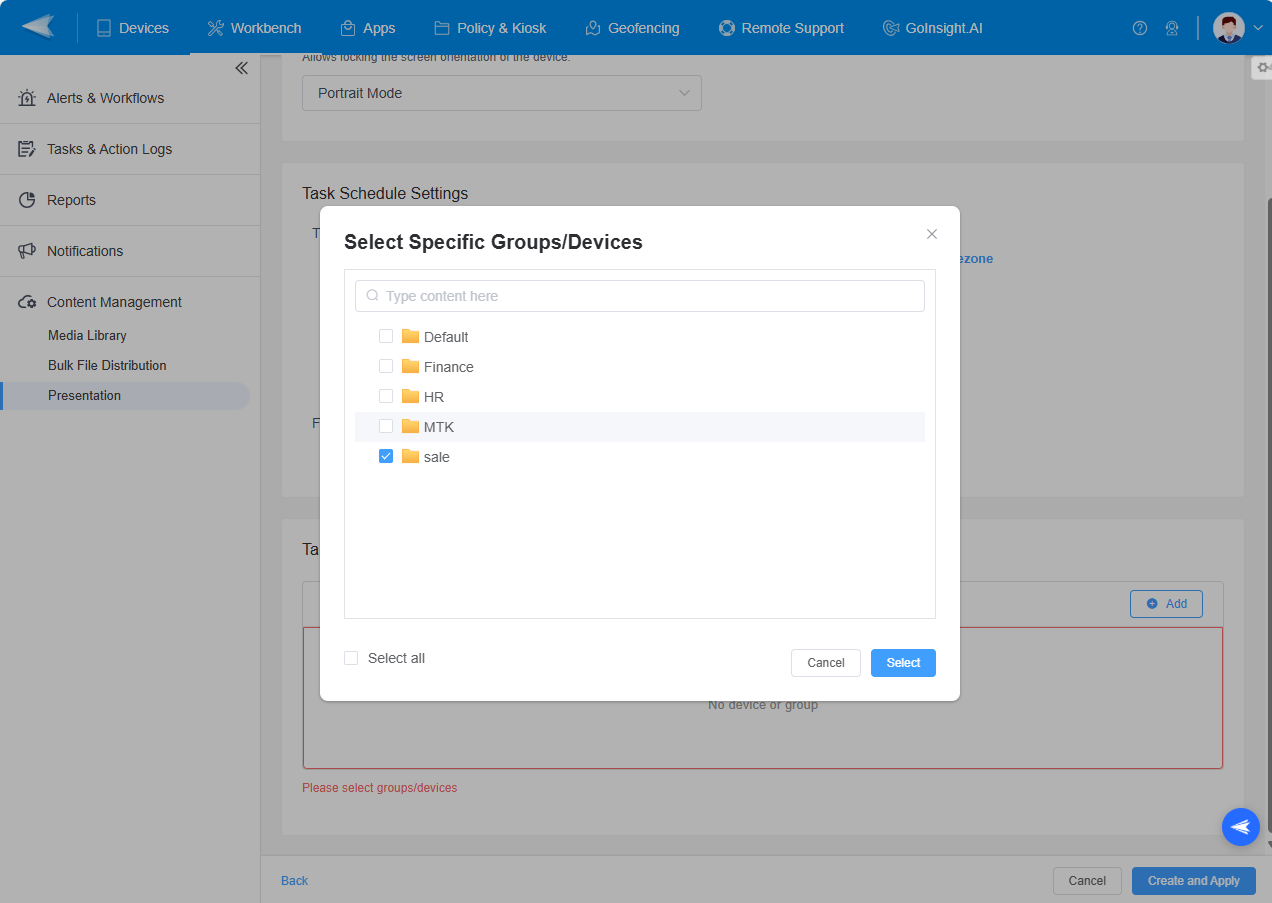
- Step 8Choose the Target Groups/Devices
Click the [+Add] button to select the target groups or devices. Then, click the [Create and Apply] button to apply the settings.
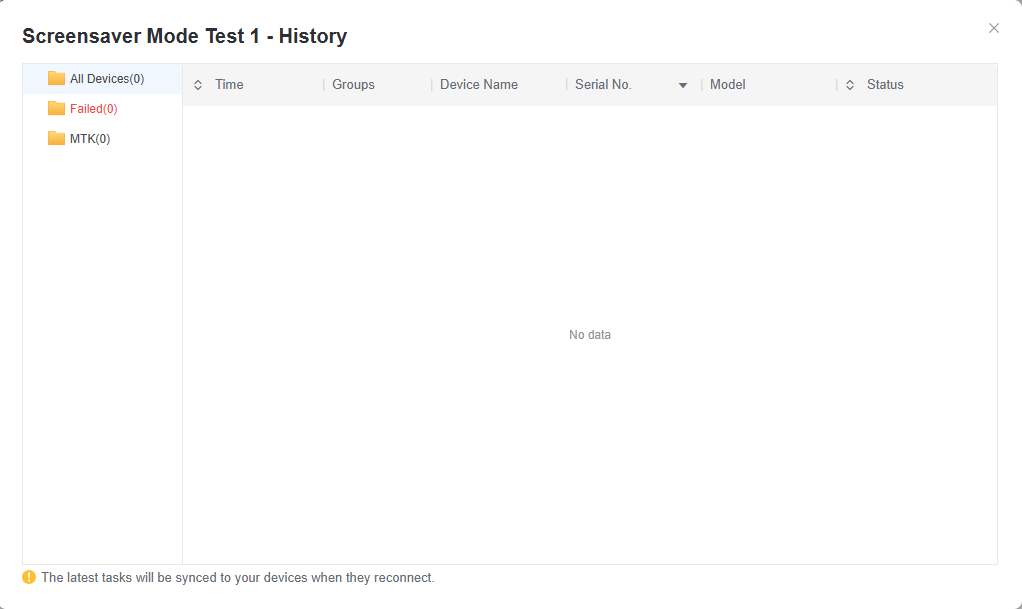
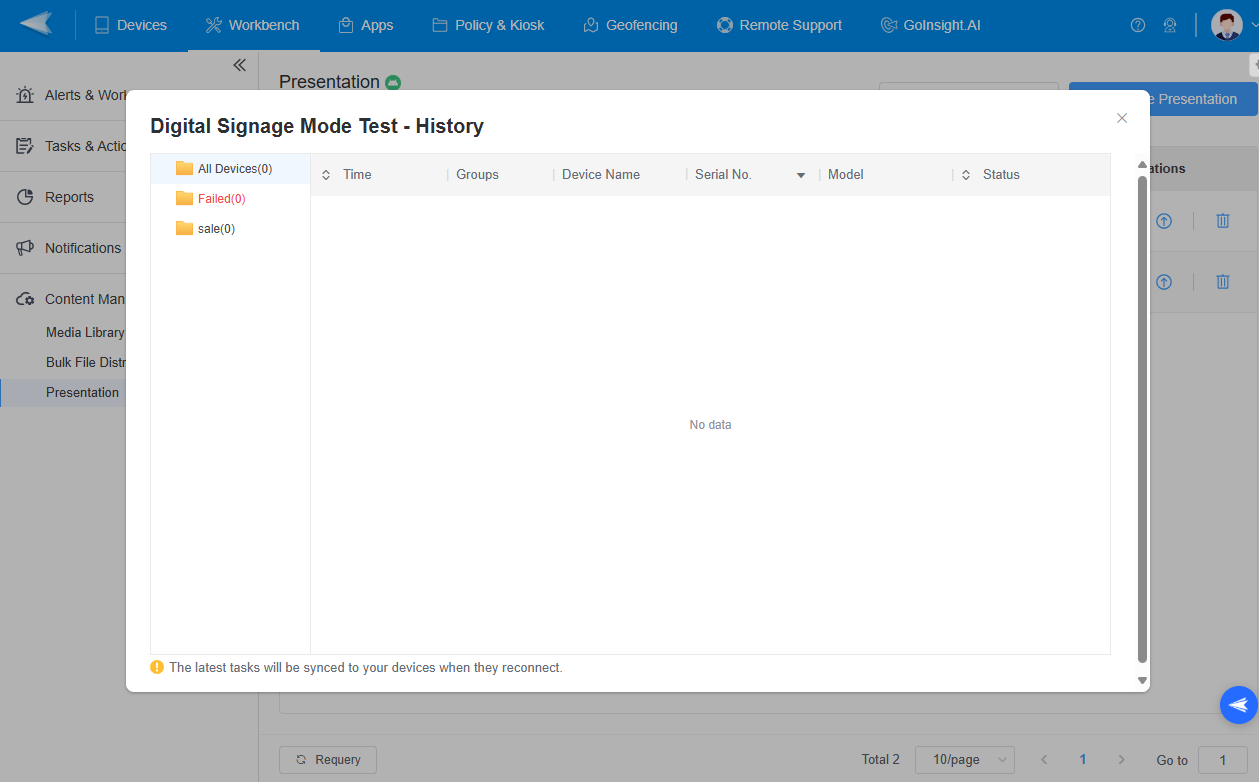
Once the task is created, you can view the success or failure of each device in the primary list.
By clicking the ![]()
![]() icon, you can check whether the Showcase application was successfully installed and authorized in the application history.
icon, you can check whether the Showcase application was successfully installed and authorized in the application history.
2 Digital Signage Mode
Devices continuously play specified content in a single app mode, suitable for environments like malls or elevator ads.
Setup Requirements:
- Step 1Use Device Owner registration for immersive content display.
- Step 2Install the Showcase app and grant necessary permissions.
Steps for Digital Signage Mode:
- Step 1Create Presentation Tasks
-

- Step 2Enter Task Name
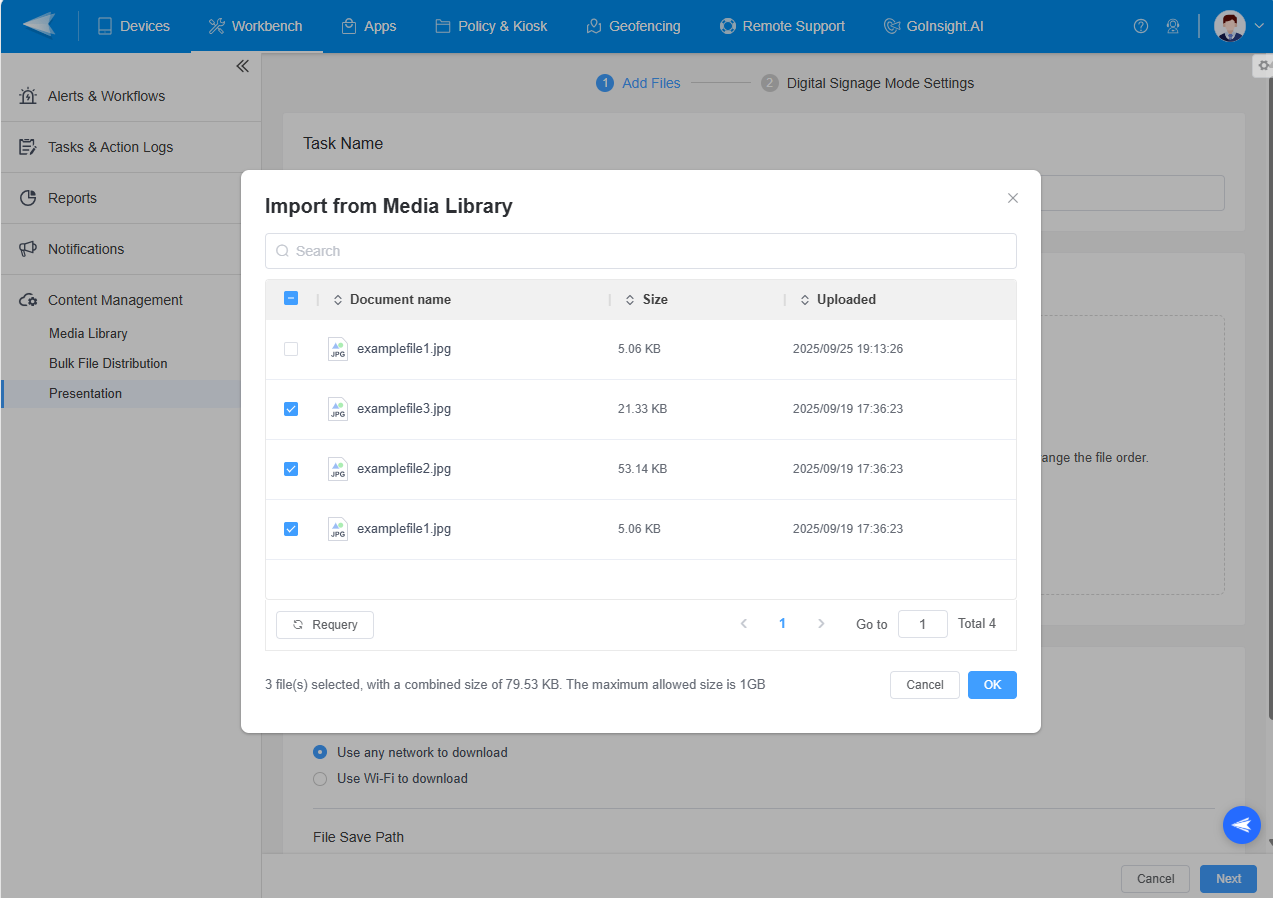
- Step 3Import Files from Media Library
Click the [Import from Media Library] and select files from the Media Library, then click [OK].
- Supports formats: png, jpeg, jpg, gif, mp4, mkv.
- The device will loop through the files in order.
- You can drag to rearrange the file order.
- You can manually adjust display duration.
- Step 4Configure File Storage Settings
You can choose download requirements: any network or Wi-Fi.
Then, choose the File Save Path by clicking the drop-down box. Then Click [Next].
- Step 5Configure Lock Screen Orientation
- Step 6Set Task Operation Time and Frequency
- Step 7Apply Task
Choose target devices for task application and click [Create and Apply].

Monitor task success/failure in the application history.
Still need help? Submit a request >>
Related Articles
You May Also Like
- How do I Choose the Enrollment Method on AirDroid Business?
- Enrollment Preparation: How to use Provisioning Template?
- How to use The Enrollment via Device Owner?
- How to use Android Enterprise Enrollment?
- How to use Zero Touch to enroll your devices with AirDroid Business?